How To Finish Live Edge Slabs 2.0
In 2018 I published a piece of content in the early days of my Youtube career that I thought was an absolute piece of trash—but it turns out 1.5 million of you watched it and got something useful from it. Now that we've grown a little bit and our production has gotten a little bit better, we're gonna redo it! I've got two slabs that I'm working on right now—one is for a client that we're gonna be finishing with a Rubio Monocoat and one is from scratch that we're gonna be using a spray finish on and making into a little coffee table. I'll bring you along for the ride and show you all the little tips and tricks that I know to finish a live edge slab regardless of which way you plan on finishing it. Wanna see the process? Check out the full video on my Youtube channel!
How To Finish Live Edge Slabs—2.0 Version
Take a look at my updated and upgraded process for finishing off live edge slabs

In this week’s video, I'm showing you how to finish off live edge slabs in two different ways. I’m showing yinz how to finish off a smaller slab with a spray finish and how to finish off one of our larger projects using Rubio Monocoat. The first few steps are the same, so you can follow along no matter which type of finish until I start the process of finishing the slabs.
The first step is to get rid of the remaining bark. Once the bark is removed, I sanded the slab to prepare the wood to fill in any remaining voids with epoxy resin. Then, I used my router jig (you can also use a CNC) to flatten the slab. When the slab is sufficiently flattened, it's time to start filling in the remaining voids in the wood. I chose to use a little bit of black dye in the resin before filling the holes in the wood, but you can use any color you want.
After the resin is dry—which usually only takes about 24 hours—it’s time to start sanding the slabs up to 150 or 180 grit. After they were sanded, I removed the remaining epoxy resin from the bottom of the slab. It is common to see small holes appear in the wood after sanding, which you can easily hit with glue to seal properly before finishing.
When you’ve covered all of the remaining holes in the wood, you can blast the slabs with compressed air to make sure there isn’t any dust remaining. After that, I began sanding the slabs with the 220 grit sandpaper. And with that step complete, we’re ready to finish the slabs in two ways.
For the larger slab, we gave it a clean wipe with Rubio cleaner and applied the finish with a squeegee. After the first coat dried, I applied a second coat and buffed the surface once the whole thing was completely dry.
For the smaller slab, I got started by wiping down the bottom of the slab with mineral spirit. Then I began spraying the surface with the pre-catalyzed finish. Since our slab is pretty small, I was easily able to hit every part of the surface and the edges. However, for larger slabs, it is better to start far away from the edge and slowly spray your way back. It is also important to watch for any overspray and make sure that your finish is going on evenly. For the very last step, I hit the slab with 3 coats of finish and then left it off the gas for 2-3 days.
Tools & Materials Used
Check out the materials and tools we used to finish these two live edge slab projects

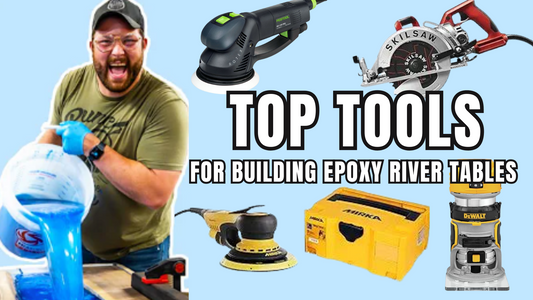
The first tool you’ll need to properly finish live slabs as I did is either a router jig or a CNC to make sure the slabs are completely flat. Then, when you’re ready to fill in the natural holes in the wood, grab your Total Boat High Performance Epoxy and Tyvek Sheathing Tape. Once your epoxy is poured, you can start manicuring the live edge with a brush sander. I also needed to grab my angle grinder with a wire wheel attachment for the tight corners, but be careful as the tool can make splinters fly all over—safety goggles first!
To get rid of the excess epoxy resin I used the Festool Rotex which is one of my favorite tools for bulk material removal. For the larger slab, I used the Rubio cleaner before starting with the Rubio Monocoat Finish. For the smaller slab that got sprayed, I used Graco Pro HVLP 9.5 with pre-cat lacquer. For the very last step, I scuffed the finish with red scotch brite.
I also had to take a second to thank Woodcraft Supplies for their high-quality tools. Without the help of the great people at Woodcraft, we wouldn't have most of the tools we have in the Dream Shop!
Top Tools and Product Affiliates
Check out some of my top tools and product affiliates here.
Extra Supplies
Check out some of my merchandise, build plans, and go-to safety glasses.
If you liked this video, check out some of these videos on my Youtube Channel!
- How To Finish A Live Edge Slab | Tips & Tricks
- We Build A $5,000 Epoxy Table Using Beginner Tools
- 5 MORE Epoxy Tips I Wish I Knew As A Beginner!
- My LARGEST River Table Pour Yet!
- CRAZY Epoxy Waterfall River Table Build


